Hey everyone, if you’ve ever worked with electronics, you know how crucial a proper enclosed switching power supply is. It’s not just about hooking up wires and calling it a day—mess that up, and you’re looking at overheating, voltage spikes, or even a total system crash. I’ve been supplying these bad boys for years now, and I’ve seen so many install mistakes that could’ve been avoided with a little know-how. Today, I’m breaking down exactly how to install one right, straight from a guy who deals with these units on the daily. Enclosed Switching Power Supply

First off, let’s skip the jargon for a sec. Enclosed switching power supplies (we call them EPS units around the shop) are the boxy ones—you know, the metal or plastic casings that protect the inner circuitry from dust, moisture, and accidental bumps. They’re used in everything from LED lighting rigs to industrial automation gear, so getting the install wrong isn’t just a hassle—it can cost you downtime and money.
Before we even touch the unit, there’s pre-install prep that most folks sleep on. I’ve had a customer call me panicking because their new EPS fried an hour after install, and it turned out they didn’t check the input voltage first. Duh. Wait, let me back up: step one is verifying your input voltage matches the supply’s rating. Most of our units are 110-240V AC universal, but some are fixed for 120V or 220V. Don’t just guess—check the label on the side of the enclosure. If you hook a 220V-only unit to 110V, it won’t turn on, and hooking 110V to a 220V-only one? That’s a one-way ticket to a dead power supply.
Next, pick a good location. This isn’t a decorative item—your EPS needs to breathe. I see people mounting them in tight corners, inside a dusty cabinet, or right above heat-generating parts like transformers. Big no-no. The enclosure has vents (if it’s a fanless model, it’ll have passive vents; fan-equipped ones have a fan for active cooling) so you need at least 2-3 inches of clear space around all sides. No blocking vents—even a small piece of tape over a vent caused a customer’s unit to overheat and shut down mid-project. Also, avoid areas with high humidity or water splashes unless you have a waterproof rated unit. If you’re installing outside, make sure the enclosure is IP65 rated or higher. If it’s not, add a weatherproof cover—trust me, a little rain is all it takes to short out the inner circuits.
Now, mounting the unit. Most EPS units have mounting holes on the back or bottom. Use screws that are the right size—don’t over-tighten them, or you’ll crack the enclosure (I’ve done that before, it’s a mess). If you’re mounting it on a metal surface, you might want to add rubber washers to reduce vibration—vibration is the enemy of internal components, especially if the supply is in a machine that moves a lot, like a conveyor belt.
Okay, onto the wiring. This is where 90% of install mistakes happen, so pay attention. First, always turn off the power at the breaker before touching any wires—electricity isn’t something to mess with. Let’s split it into two parts: input (AC power) and output (DC power, usually for your device).
For input wires: use the correct gauge wire. The rule of thumb here is thicker wire for longer runs. If your run is under 10 feet, 18-gauge is fine; 10-20 feet, go with 16-gauge; anything over 20 feet, 14-gauge. Using too thin wire causes voltage drop, which means your power supply isn’t delivering the full amount of power it’s supposed to, and that can lead to the supply overworking and failing. Also, make sure the input wires are rated for at least 125% of the unit’s maximum input current. For example, if your unit draws 2A max, use wire rated for 2.5A or more.
When connecting the input wires (line, neutral, ground), make sure they’re tight in the terminal blocks. Loose connections cause arcing, which is a fire hazard and will overheat the terminal. Don’t strip too much insulation—just about ½ inch, so the wire fits fully into the terminal without sticking out. And ground the unit properly! The ground wire isn’t just a formality—it protects you from shock and stabilizes the power. If you skip grounding, you might get a shock when touching the enclosure, and the power supply’s internal circuits can get damaged from static.
Now the output wires, which go to your device. First, check the output voltage of your EPS—most common are 12V, 24V, 48V, but make sure it matches your device. Hook a 12V supply to a 24V LED strip, and you’ll burn out the strip instantly. Again, wire gauge matters here too. For output runs, same rule: thicker wire for longer distances. If you’re running 12V, voltage drop is more noticeable than with higher voltages, so don’t cut corners on wire size. Also, make sure the output current of your supply is equal to or higher than your device’s maximum current. If your device draws 5A, don’t use a 3A supply—constantly running the supply over its max will kill it fast.
Another pro tip: use cable ties to organize your wires, and keep input and output wires separate. If you run AC power and DC power next to each other, you can get electromagnetic interference (EMI), which causes your device to act weird—flickering lights, random resets, stuff like that. Keep them in separate channels, or twist the output wires to reduce EMI.
Wait, if your EPS has a fan, make sure the fan is facing the right way. The airflow label on the enclosure will tell you: air out the back, or air out the front? If you mount it backwards, the fan will be pulling air the wrong way, and it’ll overheat. I’ve had a customer do this once—his fan was blowing into the cabinet instead of out, and the supply overheated in 10 minutes. Easy fix, but so costly.
Now, testing. You don’t want to turn on the full system right away. Do a quick test first: connect the input power only, no output device. Wait 5 minutes, feel the enclosure—it should be warm, not hot (like, too hot to touch for more than a second). If it’s smoking or smells like burning plastic, unplug it immediately—you messed up the wiring somewhere. If it’s warm, connect your output device slowly. If it’s LED lights, check that they’re the right brightness, no flickering. If it’s a machine, test it on low power first before going full blast.
Common mistakes I see all the time:
- Using the wrong voltage or current supply: I can’t stress this enough—double check the labels. We have a lot of customers who order a 24V supply for their 12V project, because they thought “higher is better” but no, too much voltage kills devices.
- Blocking vents: I get it, space is tight, but blocking vents is the #1 reason supplies fail early. We offer some compact units for tight spaces, but even those need clearance.
- Loose ground wire: This is a safety thing. Last year, a customer had a shock because his ground wire was only half-connected. Always make sure it’s tight.
- Skipping the test step: Don’t just hook it up and walk away. A 5-minute test can save you from hours of fixing a fried system later.
If you’re installing a fanless EPS, they’re a bit more forgiving, but still need ventilation. Fanless units are great for low-power applications, no noise, no fan to wear out. Just make sure you don’t mount them on a hot surface—like a metal wall that’s been sitting in the sun all day, that extra heat will shorten the unit’s life.
Another thing: if you’re using the EPS in a dusty environment, like a construction site or warehouse, you should clean the vents every 3-6 months. Dust builds up and blocks airflow, leading to overheating. A can of compressed air works great for this, just don’t blow too hard and damage the inner parts.
Now, when it comes to ordering the right supply to begin with—this is where I come in. A lot of people pick a cheap unit online and end up with junk. We supply high-quality enclosed switching power supplies that are tested for voltage stability, cooling, and safety. I always tell customers to get a supply with at least 20% more current than they need—so if your device draws 5A, get a 6A unit. That extra headroom means the supply isn’t working at max capacity all the time, so it lasts longer.
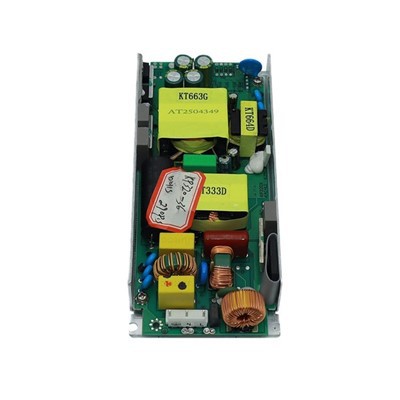
If you’re in the middle of an install and stuck, or you need help picking the right EPS for your project, hit me up. I’ve worked with everything from small hobby projects to big industrial setups, and I can help you avoid all the common mistakes. Don’t risk damaging your gear with a bad install or wrong supply—reach out and we can walk through it together.
U Bracket Switching Power Supply References:
- National Electrical Manufacturers Association (NEMA). Installation Guidelines for Enclosed Switching Power Supplies. 2022.
- International Electrotechnical Commission (IEC). Safety Standards for Power Conversion Devices. IEC 62368-1, 2021.
- Switching Power Supply Industry Association (SPSIA). Best Practices for EPS Installation and Maintenance. 2023.
- Occupational Safety and Health Administration (OSHA). Electrical Safety: Wiring and Grounding Guidelines for Low-Voltage Systems. 2020.
Guangzhou Kaihui Electronics Co., Ltd.
Guangzhou Kaihui Electronics Co., Ltd. is one of the most professional enclosed switching power supply manufacturers and suppliers in China, specialized in providing the best customized service. We warmly welcome you to buy high quality enclosed switching power supply made in China here from our factory.
Address: 2F BLDG8, Standard Ind.Park, Dongchong Town, Nansha District 511453, Guangzhou, Guangdong, China
E-mail: amy@gzkaihui.com
WebSite: https://www.kaihuipowersupply.com/
